Lockdown
Decals - The Stickers of Video Games (UE5)
Hello everyone, I am Ben Duckett, Team Leader, and Artist of the game Lockdown. Recently I have learned how to make and implement Decals in Unreal Engine 5 and ill show you my process of making them.
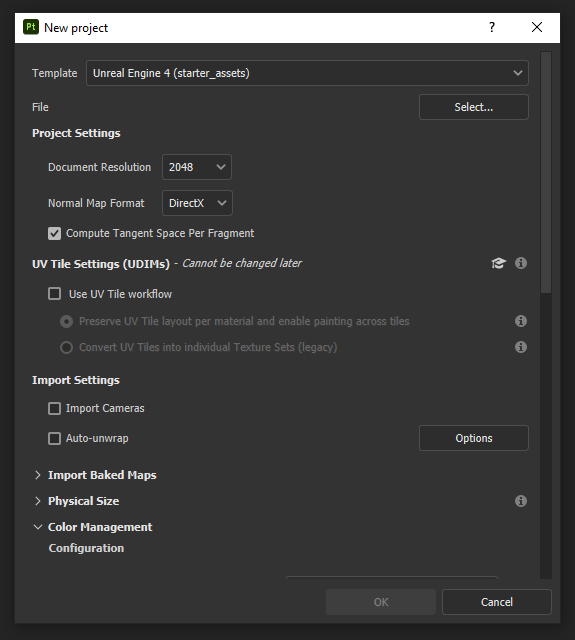
I used Substance Painter to make these decals. I imported a 1x1 plane asset that was created in Maya. In creation of the project I selected Unreal Engine 4 (starter Assets) and made the document resolution to 2048, and Normal Map Format Direct X for Unreal Engine Use.
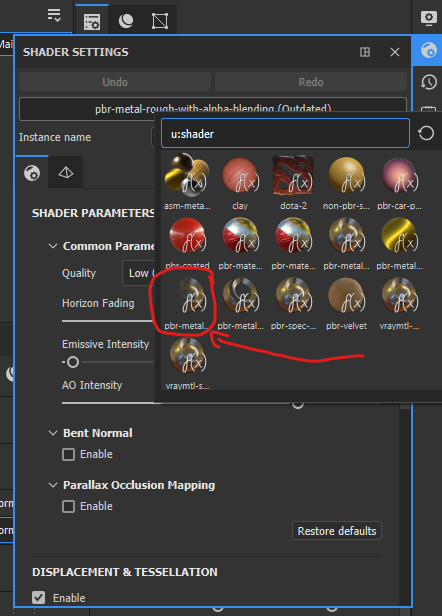
After creating the project, the first thing you need to do is change the shader settings. On the right side of Substance (for me) is an icon of a ball with a cog in it. Clicking on that will open the shaders tab. Then click on the text bar underneath Undo and Redo buttons. When this is open itll open the shader options, click on the pbr-metal-rough-with-alpha-blending. This is the shader you need for Decals in UE, but I believe it works for any asset you want to use for Unreal Engine. Because this Shader gives you the Opacity slider in Substance.
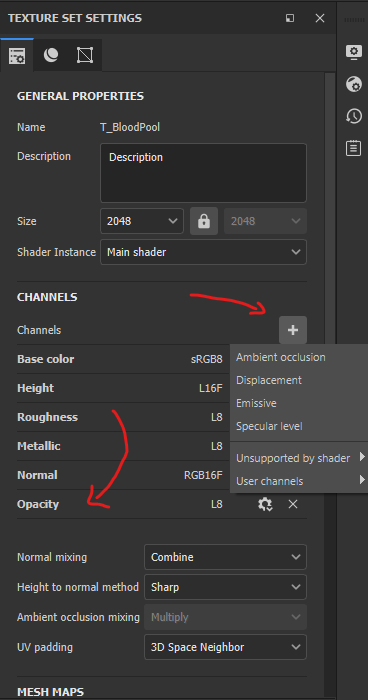
Now that this shader is active you need to active the opacity slider for the project. In your Texture Settings window, under channels add a new channel with the plus sign and click on Opacity in the selection and it will appear in your channel listings. Opacity is now and active option.
First layer I make is just an opacity layer, Make a New Fill layer, turn off all channels except for opacity. Move the slider to 100% white and it will make your 1x1 plane invisible. To make your plane visible you can either turn the slider to 100% black or the easiest way, just click the little eye icon to the left of the fill layer and it will disable the opacity till clicked again.
Now you are ready to make decals!
The Two examples ill show is making Numbers. These examples follow the exact same steps, I just want to show the different options there are.
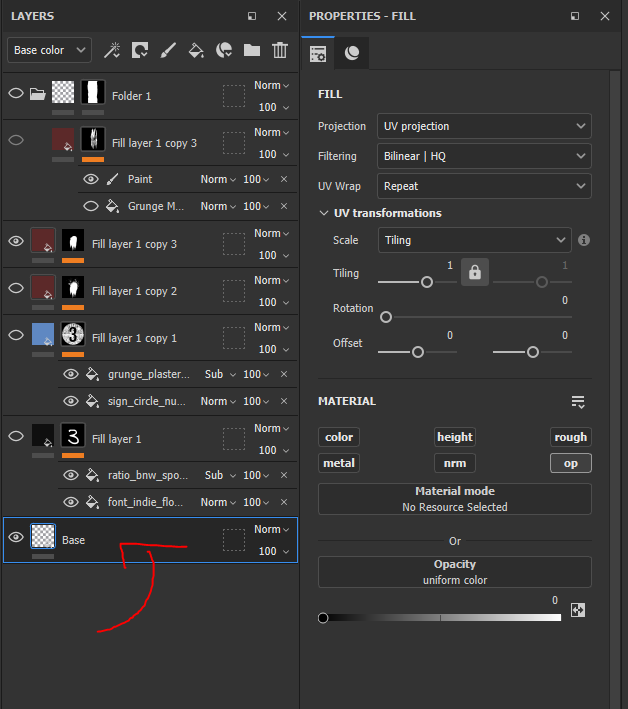
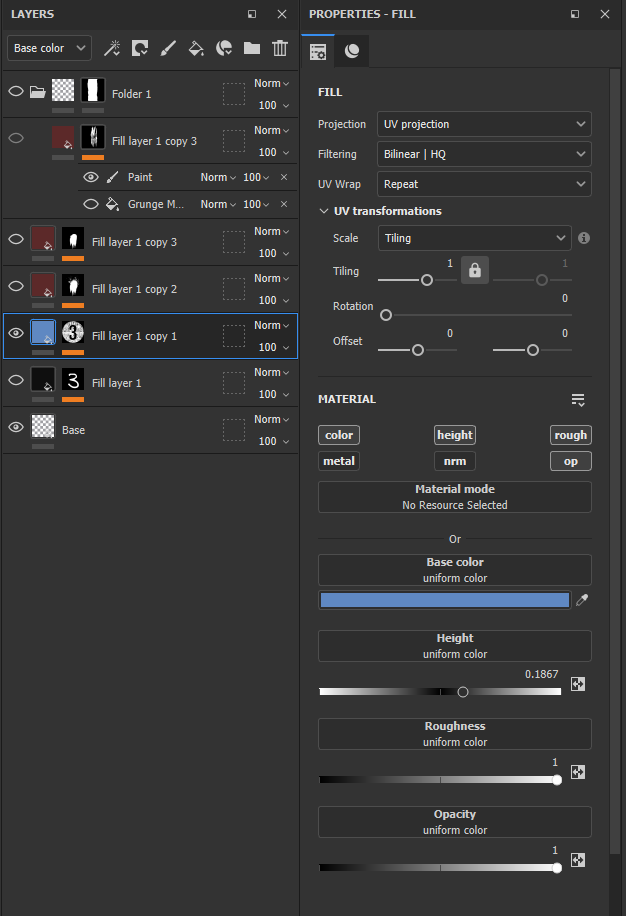
The next step is to make a fill layer, This layer will control the over all Color and definitions of your decal. For this decal I wanted it to be painted onto the Concrete wall. So I went with Blue Color, Raised to height to make the paint seem like an added addition, 100% rough since its dried matte paint. You can also affect the opacity here too. (I used this setting in the red layers above for dried blood, so you can see the floor tile through it.)
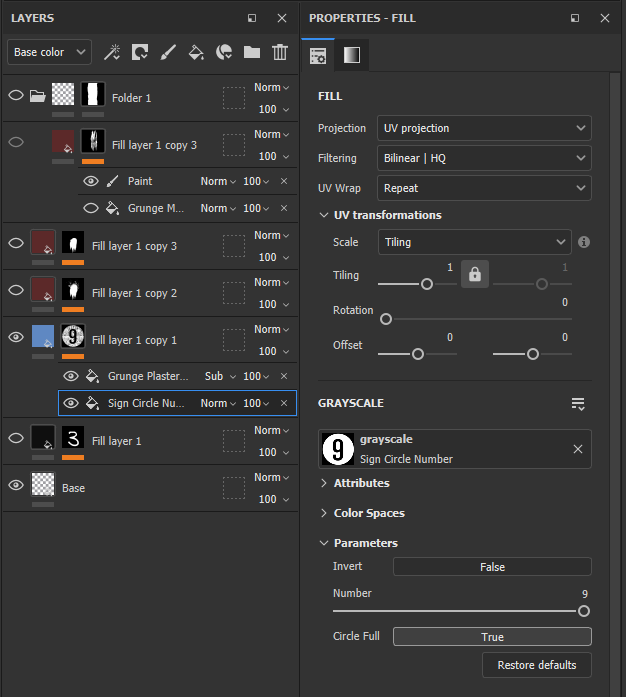
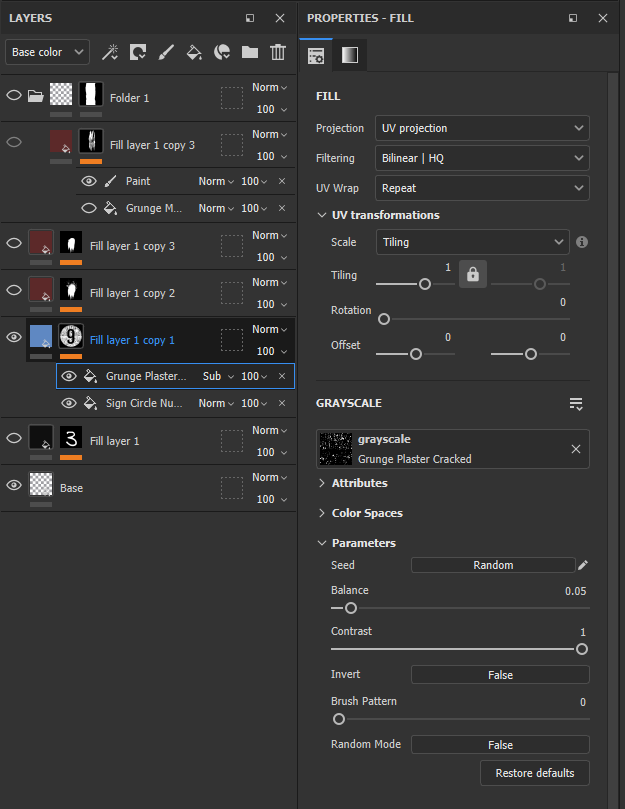
After the fill layer I added a Black Mask to it, because I'm adding the details, not subtracting details. Then I add two fill layers to the Black Mask. First layer has the Sign circle Number Alpha in it, this is where I can change the number between 1 – 9, This ability to change the number on the fly helps cut time or making a paint layer and manually applying it. The other Fill layer has the Grunge Plaster Cracked onto it but this layer is set to Subtractive, to help make the decal feel worn and falling apart, like old paint would on concrete. With this being on its own layer too, you can edit the balance, contrast and tiling so each decal you make can have a different worn look. And that’s it! You can add more layers to make them more unique, but for this decal I only needed the two layers.
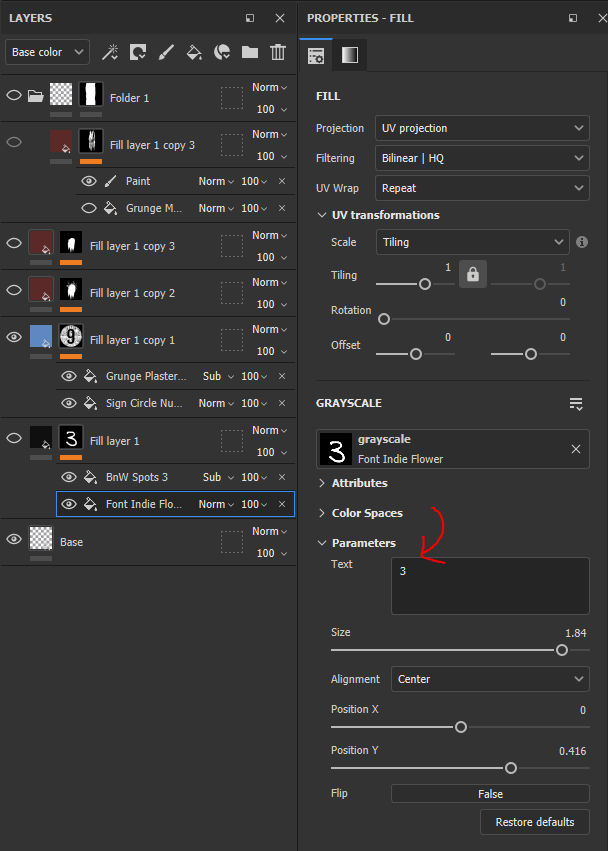
For the second example, instead of using the Sign in Circle alpha, I used Font Indie Flower to make handwritten numbers from a sharpie. But neat thing about using fonts you can make whole phrases just by typing in the Text section of Parameters. And this part is the most exciting, you can add new fonts to your library! So all those adobe fonts you’ve been using or not using can be imported to Substance and made into a Font system! That’s all, excitement over.
And once you are done making your decal, you can export it out as usual! Just make sure you turn on that Base Opacity setting before you do, or your decals will have a lovely grey box around them.
Now in Unreal Engine 5, Import your new decal textures as normal (I drag and drop them into the content folder) Here a warning, if you made a blue decal like I did with the number 3 make sure that UE5 keeps that Color File as an color file, mine on several occasions make that file into a Normal Map file. Which means it won't have opacity capabilities and you will be confused for days why your one blue color decal is not opaque. Definitely wasn’t what I went through....
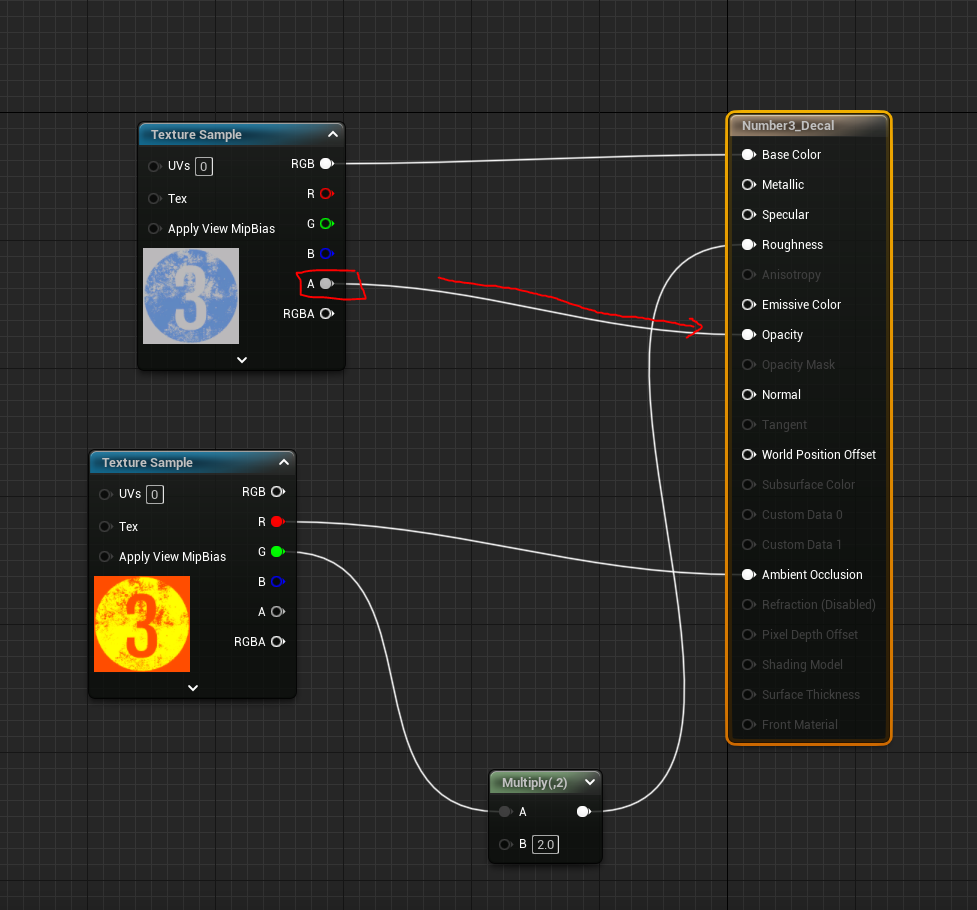
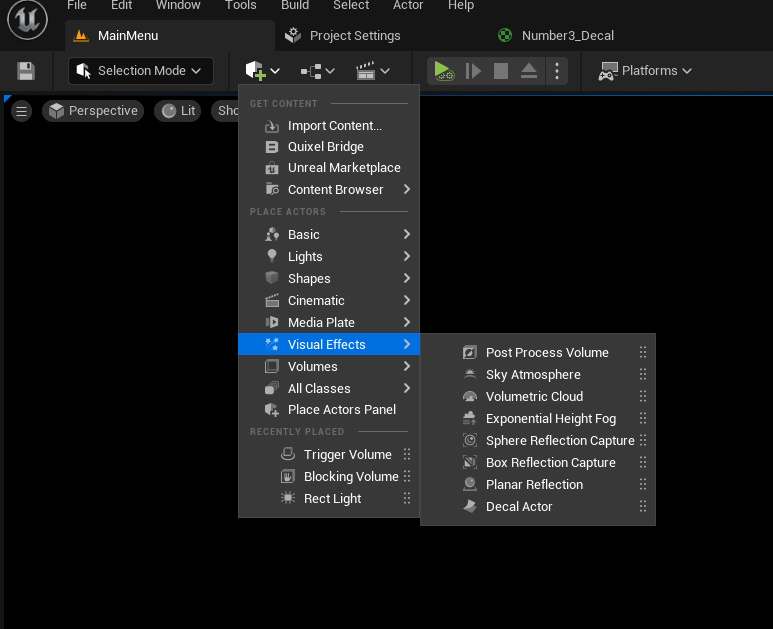
Now that the files are in correctly, make a new Material. And drag in your texture files. Before you attach the files tho, Click on the Material Node and in the details panel change Material Domain to Deffered Decal and Blend Mode to Translucent. Deferred Decal Unlocks the Opacity Node, and translucent make its opacity work. Now connect the texture nodes to the material nodes, but make sure you connect the A node in your color texture to the Opacity Node, that is where substance hides the opacity option. Once those are connected, save out the material and drop a Decal in your Map Level. You can simply add one using the quick add (cube with a green plus), selecting Visual Effects and Decal Actor at the bottom. You can change the size of the decal in the decal settings.

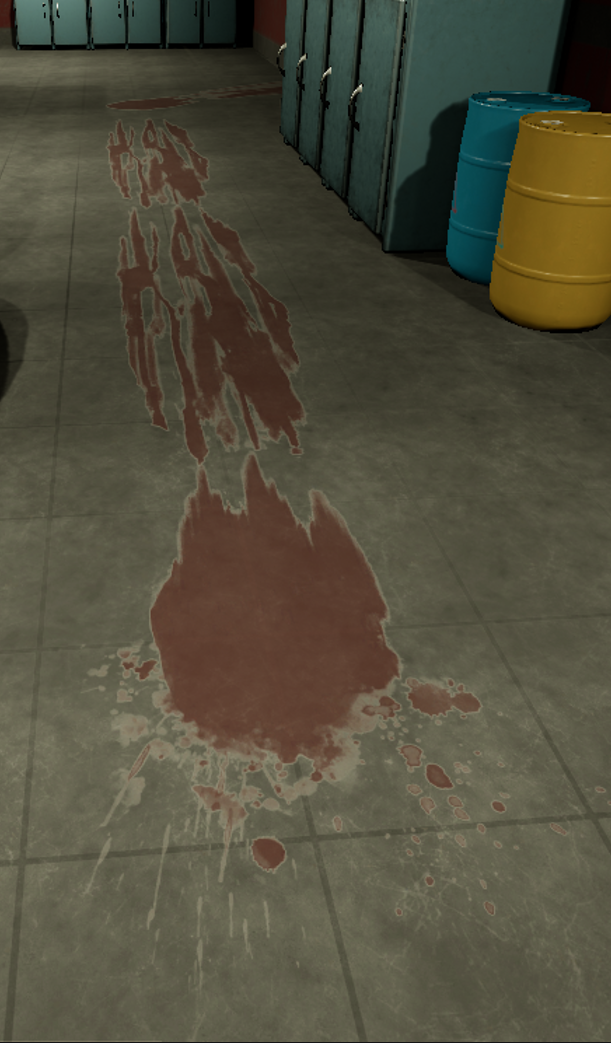
And there ya go, your decal is in the game!
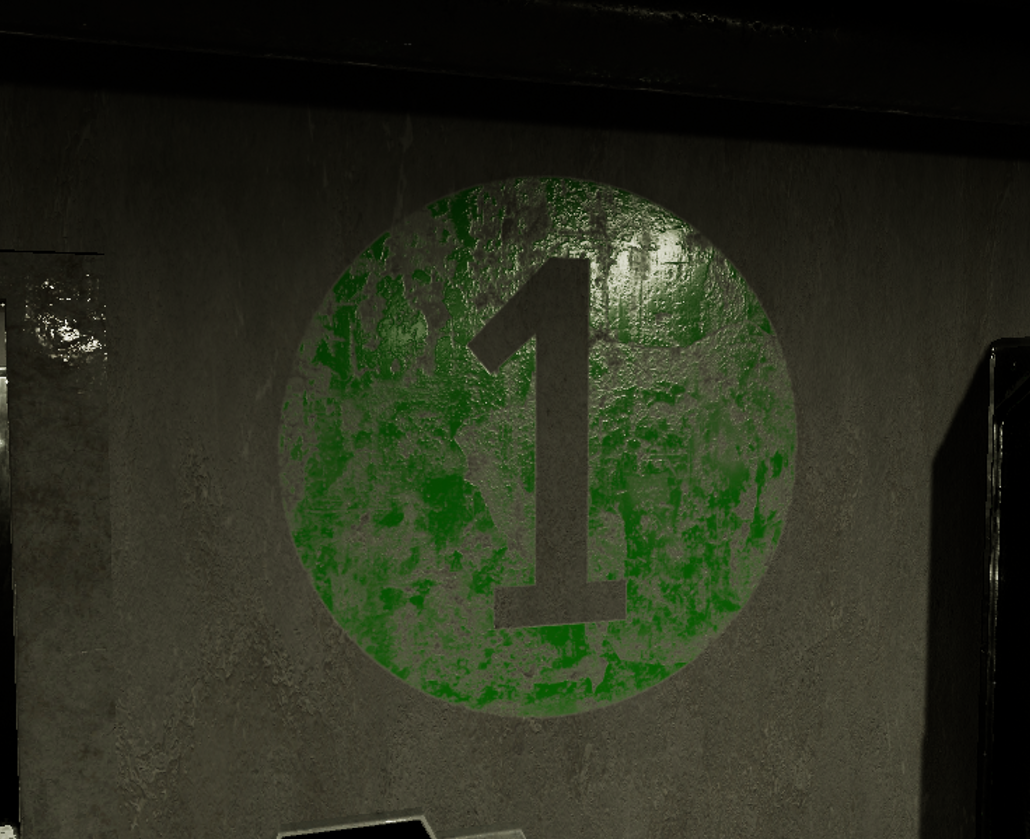
Here are my in game Examples!

Leave a comment
Log in with itch.io to leave a comment.